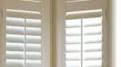
2 Inch Faux Wood-Fixed Arch Blinds
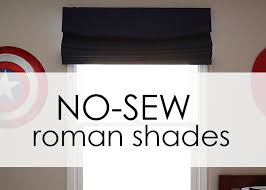
We've Got the Doorglass Configuration That's Just Right for You Once you've selected your door glass, you'll want to choose from our wide variety of configurations. Whatever doorglass pattern you choose, ODL has the shapes, sizes, and designs that best compliment your home's entry doors. Use the ODL Doorglass Selector to browse through designs based on shapes and sizes. Shapes & Sizes for: 1/4Center Small Rectangle Doorlight 1/4Craftsman Arch Top Doorlight 3/4Center Round Top Doorlight Custom Door Glass Program Glass Textures & Colors Clear or Privacy Glass Severe Weather Door GlassI'm so excited to announce that my first book, THE I HEART NAPTIME COOKBOOK: 100 easy and delicious recipes to make than less than an hour is now available for PRE-SALE! Today I’m going to show you how to make inexpensive NO-SEW roman shades! Turn a basic curtain into a beautiful roman shade in just a few simple steps! I’ve been wanting to make roman shades for quite awhile but to be honest they intimidated me.

I can sew, but I am by no means a professional. Every tutorial I saw for roman shades just looked daunting! I thought it would take me years to finish them. Then I saw this post on Little House Big Plans where they used old blinds and I thought -GENIUS! I already had blinds and curtains hanging up in my sons room, so one night I decided to tackle the project. It ended up taking me about 2 hours. I was taking pictures along the way, so you may even be able to finish them sooner than that! To buy all the supplies to make the other roman shades I was planning on it would actually be cheaper to just buy cheap blinds from Walmart or Target if you didn’t have any on hand. 1. The first thing you’ll need to do is measure your window and determine your fabric length. Decide how wide and long you want your shades to be. I wanted my shades to sit about 5 inches above the molding so the room would feel taller. You could place the blinds directly on the molding though. 2. Lay blinds out on the ground and cut the “ladder” string.
You will throw this top string away. Make sure not to cut the thicker string that is connecting all the blinds in the middle. 3. Remove the caps on the bottom part of the blinds so you can release the strings. 4. Untie the knot and pull the strings away from the bottom bar. 5. Figure out how many pleats you want, depending on the length of the window. I placed my blinds 10 inches a part. Then remove the remaining blinds and discard. Pull the string back through the bottom bar and tie a knot once you have the right length. 6. Then lay the blinds on top of your curtain. If you need to hem your curtain, do it at this point. You could even fold in the edges and use the no-sew glue. My curtains were the same size as my window, so I didn’t need to cut anything but the bottom. Use your measuring tape to mark the space between the blinds. Then cut the remaining fabric at the bottom. My string was a little short, so I tied on some string to make it longer. No one will ever know.

Then fold the bottom piece of fabric over the bottom bar and hot glue it on. Then secure the top base to the fabric with hot glue. Make sure to glue the fabric on the front of the blinds base (at the top) so you can still hang it up. Next you’re going to glue down the blinds. Make sure to place the glue on the curved side. Make sure not to glue the string!
Pitbull Puppies For Sale In Jacksonville FloridaOnce you have everything glued on, you can pull the strings a little to make sure none of them are glued on.
Hud Homes For Sale In Ashville Ohio Secure the blinds with clothespins and allow the glue to dry overnight.
Homes For Sale Hudson Ohio Howard HannaThen the next day you can hang up the shades right inside the brackets.

They should just slide right in. When it’s installed, you’ll shade will be able to slide up and down. Here’s what they look like down. Then pull the blinds up and you have fully functional roman shades! If you already have blinds and curtains up, these won’t cost you a penny! More tutorials on how to make roman shades: Roman shade tutorial -if you know how to sew and want to make the one’s with the wooden dowels, this is a great tutorial! Faux roman shade tutorial using tension rods – great if you don’t need your’s to pull up and down. posted in DIY crafts, Home decor, Sewing, TutorialThe web address you typed in the browser may be wrong, or the link you clicked may be broken. We might be having technical problems. The content may no longer exist on our web site. We apologize for any inconvenience. Choose a Country Site Kalaallit Nunaat - Kalaallisut Korea, Republic of - English Find an Alcoa Business Alcoa Architectural Products (Americas / Pacific / Caribbean)

Alcoa Architectural Products (Europe / Africa / ME / China) Alcoa Australia Rolled Products Alcoa Building & Construction Systems Alcoa China Automotive Products Alcoa China Rolled Products Alcoa Engineered Products & Solutions Alcoa Fastening Systems & Rings Alcoa Fastening Systems & Rings Aerospace Alcoa Fastening Systems & Rings Industrial Alcoa Forgings and Extrusions Alcoa Global Commercial Transportation and Industrial Alcoa Global Flat Rolled Products Alcoa Global Primary Aluminium Alcoa Mold & Tooling Products Alcoa North American Rolled Products Alcoa Oil & Gas Alcoa Power and Propulsion Alcoa Primary Aluminium – Europe Alcoa Primary Aluminum - North America Alcoa Titanium and Engineered Products Alcoa World Alumina Minerals Building & Construction Market Industrial Products & Services Market Kawneer Alcoa Architektur Systeme Browse by Product Category