Cost To Replace Toilet Flapper

Cost to Repair a Leaky ToiletUpdated: June 2016 Running Toilet Repair Cost CalculatorZip Code Toilets Toilet Labor - Basic Toilet Materials and Supplies Totals - Cost to Repair Leaky Toilet - Average Cost Per Toilet Get an INSTANT, detailed estimate of the cost to Repair a Leaky Toilet! Our free calculator uses up-to-date, trusted data to estimate typical subcontractor costs for a Running Toilet Repair project. For a basic 1 toilet project in zip code 47474, the benchmark cost to Repair a Leaky Toilet ranges between $200.39 - $250.70 per toilet. To estimate costs for your project:1. Set Project Zip Code Enter the Zip Code for the location where labor is hired and materials purchased.2. Specify Project Size Enter the number of "items" required for the project.3. Re-calculate Click the "Update" button. Do you need professional help for your project? The FREE homewyse hiring guide helps you find and hire great help, get quality craftsmanship and create a fair contract.

Cost to Repair a Leaky Toilet - Notes and General Information These estimates are for BASIC work performed in serviceable conditions by qualified trade professionals using MID GRADE materials. Work not mentioned on this page and/or work using master craftsman, premium materials and project supervision will result in HIGHER COSTS! These estimates are NOT substitutes for written quotes from trade professionals. Homewyse strongly recommends that you contact reputable professionals for accurate assessments of work required and costs for your project - before making any decisions or commitments. The cost estimate includes: Costs for local material / equipment delivery to and service provider transportation to and from the job site. Costs to prepare the worksite for Running Toilet Repair, including costs to protect existing structure(s), finishes, materials and components. Costs for job cleanup and debris removal at project completion. Labor setup time, mobilization time and minimum hourly charges that are commonly included for small Running Toilet Repair jobs.

The cost estimate does NOT include:Costs for removing, relocating, repairing, or modifying existing framing, surfacing, HVAC, electrical, and plumbing systems - or bringing those systems into compliance with current building codes.
Homemade Deer Blinds PlansCosts for testing and remediation of hazardous materials (asbestos, lead, etc).
Chorkie Puppies For Sale Tn General contractor overhead and markup for organizing and supervising the Running Toilet Repair.
Akc Great Dane Puppies For Sale OregonAdd 15% to 23% to the total cost above if a general contractor will supervise this project. Sales tax on materials and supplies. Permit or inspection fees (or portion thereof) required by your local building department for your overall project.
Cost to Repair a Leaky Toilet - References Unit Pricing Data: Faucet Direct Plumbing Fixtures and Supplies Faucet Direct, Jun 2016, Website Unit Pricing Data: Kitchen Source Plumbing Products and Supplies Kitchen Source, Jun 2016, Website Unit Pricing Data: Plumbers Stock Products and Supplies Plumbers Stock, Jun 2016, Website Unit Pricing Data: Lowes Plumbing Products and Supplies Lowes , Jun 2016, Website Unit Pricing Data: Westside Online HVAC Pricing McCoys, Jun 2016, Website Manual of Standard Estimating Practice American Society of Professional Estimators, Jul 2012, Editorial Staff The HUD PATH Rehab Guide Volume 8: HVAC/Plumbing U.S. Department of Housing and Urban Development Office of Policy Development and Research, Mar 2011, Editorial Staff NKBA Bath Planner the National Kitchen and Bath Association, Jul 2012, Carpentry and Building Construction, Student Text Glencoe/McGraw-Hill; 6th edition, Jan 2003, Mark Feirer, John Feirer, ISBN 007822702X

Running Toilet Repair - Average Cost Per Toilet Expect to pay in the higher end of the price range for a licensed, insured and reputable pro - and for complex or rush projects.To lower Running Toilet Repair costs: combine related projects, minimize options/extras and be flexible about project scheduling. Help the homewyse Community We're a cooperative community that values and depends on your input. So, let us know - how can we improve this site? Would your friends and online contacts benefit from homewyse information? Make homewyse better for everyone - send your feedback or share this page. Send your feedback or questions. Share homewyse on Facebook, Twitter or Google+ using the buttons below: QuietFill Valve and Flapper KitUniversal PerforMAX High Performance Toilet Flapper with MicrobanAdjustable Toilet Tank FlapperToilet Tank Flappers (3-Pack)Toilet Tank Flapper for TOTOFlapper Class 5 for 2-Piece ToiletsUniversal Flush Valve Repair KitToilet Tank Flapper for Glacier Bay
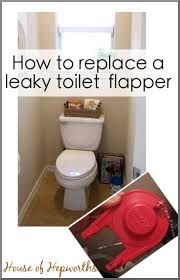
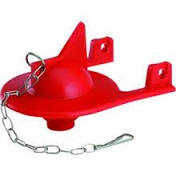
Hinge Flapper Used in Various 1-Piece ToiletsBlue Flapper with Float Used in Various Two-Piece ToiletsUniversal PerforMAX High Performance Toilet Tank Flapper with Microban (Contractor 3-Pack) Adjustable Universal 2 in. 2 in. x 4 in. Toilet Tank Flapper for KOHLER/Amerline Cadet 3 5.5 in. Compact Toilet Tank Flapper Tank Ball and Lift WireToilet Tank Flapper for TOTO Power Gravity Compared with some of the headaches that go along with home ownership, a leaky kitchen faucet or toilet tank valve is a minor problem. Yet a steady trickle of water is a waste of both water and money, and eventually it will get on your nerves. Both of these problems can be fixed quickly, and unlike many more involved plumbing jobs, these repairs require only a few ordinary tools. For foolproof instructions, we called on a pro who performs these repairs on a regular basis—David Sorrell, of Goodhill Mechanical Contractors in Woodbury, Connecticut. Replacing a Flapper Valve When water seems to trickle through a toilet long after it has been flushed, a worn rubber flapper valve at the bottom of the tank is probably to blame.

When you flush the toilet, the flapper lifts, letting water flow into the bowl. As the tank empties, the flapper sinks to block the opening, which allows the tank to refill. Although durable, the flapper can wear out over time, providing a less-than-perfect seal. The result is an audible trickle, punctuated by an occasional surge of supply water topping off the tank. You might be able to get the trickle to stop by jiggling the handle, but eventually this trick stops working. A faulty flapper valve can drive up water costs, and if the supply line is plumbed with warm water to prevent condensation, heating costs will go up, too. Changing an old flapper for a new one ($5 or less) is a quick job. Begin by closing the supply line to the tank. If the valve looks corroded or weak, Sorrel recommends turning off the water at the main, not at the tank. Similar But Not Identical Flapper assemblies differ slightly depending on the make and model of toilet. But the basic process of replacing them is the same.

There are many makes and models of toilet, but the flapper-valve assembly will look basically the same. Removing the rubber flapper from the assembly is easy. Some snap off and require no tools; others are held in place with a machine screw. Although generic flappers are available, stick with the part made for your toilet—provided you can find a replacement. Note the brand of toilet, and take a look at the valve assembly before you shop. Better yet, take the flapper with you to be sure you get the right one. Plumbing jobs are famous for prompting repeated trips to the store for more parts. But there's no need to visit more often than you really have to. Shown: The flapper on this flush assembly pops off without any tools. Simply replace the old flapper with a new one. Be careful not to break off the barbed plastic pin. Use emery cloth to smooth any rough edges around the lip of the valve seat that would prevent a watertight seal between the flapper and the seat. The Drip That Drives You Crazy

Time, use and water that is overly acidic or mineral-laden can wear out the type of single-lever valves now common on sink faucets and shower controls. When the lever is pushed all the way down and the faucet continues to drip, the culprit is a worn valve-stem assembly. You can swap this worn part for a new one in about 20 minutes, and without any under-the-sink gymnastics. Actually, it could take you longer to find the right part than it does to make the repair. Most major faucet manufacturers make single-lever faucets, and replacement parts are widely available at home center and hardware stores, but the valve assemblies are not interchangeable. Even different faucet models from the same manufacturer are likely to require different valve replacement parts. It will be easier to get the right parts if you know the name of the manufacturer and the faucet model number. If you know the manufacturer but not the model, a local plumbing-supply house might be able to narrow the choices for you.

If all else fails, pull the old part before buying a new one. That's not the most convenient option, Sorrell says, but at least it's foolproof. We used a Moen faucet for the steps shown here. If your faucet is from a different manufacturer, the parts will look a little different. But, according to Sorrell, the procedure for replacing them is virtually the same. Cartridges are available in both plastic and brass; plastic cartridges work just as well as their brass counterparts, and they are a few dollars cheaper. If you have well water, Sorrell suggests the plastic model because it is less susceptible to damage from untreated water. Pop the Faucet Cap Your first step is to shut off both hot- and cold-water supply lines under the sink, and here Sorrell advises caution. Shutoff valves in older plumbing systems can be corroded, especially when connections are threaded instead of soldered. "I've had them crumble right in my hands," Sorrell says. An uncontrolled geyser under your sink is no way to get started, so if the shutoff is suspect, use the main shutoff valve, located where the waterline enters the house or at the pressure tank.
Another preliminary step: Block off the sink drain with a rag so small parts don't disappear. Pop to the cap on the top of the faucet with a screwdriver or utility knife, then remove the single screw to free the faucet lever. You might need to work the lever back and forth gently to pull it up. Free the Retainer Nut Use slip-joint pliers to free the retainer nut uncovered when you removed the lever. You will cover this nut when you reassemble the faucet so don't worry about marring the finish. While you have the spout off, Sorrell suggests you replace the O-rings on the body of the faucet, which prevent leaks at the base of the faucet. You can buy O-ring kits where you buy cartridges. Use a small screwdriver to ease off the old rings. Install new ones with lubricant supplied with the replacement kit. Remove the Old Cartridge Remove the cartridge, but first note the location of the small notch at the top of the stem. When you install the new cartridge, make sure the notch points in the same direction.