Home Depot Tub Protector

Adding an outdoor fountain is a great way to make your backyard or deck more relaxing. The sound of the trickling water will melt away stress and mask the sound of traffic or other intrusive noises. This terra cotta pot fountain will also add a lovely visual point in your outdoor space. To build your own DIY outdoor water fountain, follow these step-by-step instructions. Begin by sealing any holes in your largest planter with the epoxy putty. The bottom planter needs to be completely water tight for the proper operation of the fountain. Place the pump in the base of the large planter. Connect the flexible tube leaving yourself plenty of excess tubing for the moment. Center the 10 in. support pot on the 12 in. saucer, center it and glue it into place using the construction adhesive. Once the adhesive has set, use the saw to cut a small notch into the lip of the pot. The notch should be big enough to allow the power cord of the pump to pass through. Next, flip the support pot and saucer assembly upside down, and drill a hole in the center of the saucer just large enough to allow the flexible tube to pass through.

Repeat Steps 2 and 3 for the next support pot and saucer. Drill through or increase the diameter of the center holes of the middle and top tier planters.
How To Make A T Shirt On Imvu Route the flexible tube through the first support assembly.
Pitbulls Puppies For Sale In DenverPlace the support assembly into the large base planter taking care to make sure the power cord passes through the notch and drapes over the lip of the large planter.
Best Price Polywood Furniture Thread the flexible tube through the middle tier planter and slide it into place. If the tube fits snugly through the hole you drilled, then there’s no need to seal around it. If the pass-through is loose, then seal around it with construction adhesive.

Thread the second support assembly, finishing with the top tier planter. Move the fountain to your garden, deck or wherever you choose for its final home. To make sure the water cascades evenly out of the planters use a level to check for square, and adjust as necessary. Fill the bottom two planters with stones, then cut the flexible tube just short of the lip of the top planter. Install the flow control onto the tube. Make sure the flow control is turned to its lowest setting as it will be adjusted in a later step. Cover the lower and middle saucers with the beach stones. For the best look, make sure the stones reach the lips of the terra cotta pots. Fill the top planter with stones till it stops just below the flow control. Fill the bottom planter completely full of water and plug in the pump. As the pump sends the water up, adjust the flow control knob to your preferred rate of flow. When that is complete, fill the remainder of the top planter with stones keeping the hose as centered as possible.

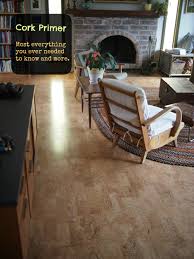
Add water as needed to make sure that the levels of each planter stay consistent. Now kick back, relax and enjoy your outdoor fountain. Take a look at more DIY projects here on The Home Depot blog and follow our Outdoor Living board on Pinterest for more inspiration. This project can be made with a wide variety of materials, so browse The Home Depot’s wide selection of pots and planters online to find the right style for your DIY water fountain.If you have questions about this or any other home improvement project, check out The Home Depot Community for quick answers and solutions.TrafficMaster Allure Vinyl Flooring Revisiting this ever-popular post about Home Depot's Trafficmaster Allure vinyl flooring, we noticed a Home Depot employee left extensive additional comments and details about the product, so we thought we'd repost this with updated information for the many visitors who come to this particular post specifically for TrafficMaster Allure information.

Have you ever wanted wood floors in your bathroom but thought otherwise because of concern about moisture? We've been reading up about Home Depot's exclusive TrafficMaster Allure flexible vinyl planks and think they might be worth investigating if you're looking for a waterproof flooring solution. TrafficMaster Allure vinyl planks are completely waterproof, come with a 25 year warranty, are available in a multitude of colours and wood types (complete with texture) to match the decor of your home, and install with a pre-ready adhesive interlocking system which they call GripStrip. More details after the jump.*originally posted March 8, 2007 According to comments below, many seem pleased with the results, finish and appearance of these flooring planks (when properly installed), thanks to their flexibility in feel and application. The vinyl planks stick to one other with pre-applied adhesive on the edges, without a need for any additional glue, and the only recommended tool for installation is a razor knife.

At $1.99 per sq. foot, the Allure vinyl planks sound like an ideal novice flooring renovation project in the making with their score and snap installation, with a box covering 24 square feet. A Home Depot employee recently chimed in about sample availability and installation issues: I work at the Home Depot in Peru, IL. and I was browsing on the Home Depot website doing research about the Trafficmaster Allure product myself, since so many customers were asking about other styles available-and all of a sudden i saw all of these different styles available on the site! So I called out to Halstead (the actual manufacturer of the Allure line), New England, got a hold of one our reps, Cate French, and asked her if it would be possible to get samples in case customers wanted material samples, and she said "yes", but the sample boards were on backorder (due to the popularity of the product). But she would put our store on the list, and in the meantime, she would cut up pieces of the planks and send them with little labels for customers to at least see a piece of the planks.

So I was so happy to get those little squares from her, and we had a lot of customers come in and look at them. However, we didn't get our first big sales on the stuff until we recieved our large sample boards, with a lot larger version of the planks on them. So far, we have done about 4 large orders for the s/o in our store. And I'm sure a lot more. Granted, this stuff is what it is, don't expect miracles, but the best thing about it for us, is that its the only TRULY waterproof floor in the entire store. People love it also because anybody can lay it down, as long as you follow a few simple directions(such as leaving an expansion gap around the perimeter; letting the vinyl acclimate to the humidity and temps of the room you will be installing in; rolling the entire floor out with at least a 100lb roller; making sure to get the seams as tight as possible; making sure that you install it in a room that has heat vents so that it doesn't start to buckle-unless of course you like that look).
The reason that it is waterproof is because the "grip strip" of adhesive on the sides of each plank interlock, and when the are rolled out, and firmly pressed together, if water or any liquid happens to spills directly over the seam, there is literally no where for the liquid to go. It just beads up on top of that overlap. I also recieved this really helpful book in the mail from the company on Allure, and it has helpful hints for install, care and maintenence, and all kinds of things you can't find on the web. Halstead also make a more commercial and more expensive line of resilient flooring called Metro Floor. They make planks and tiles and all that, but they all have to be glued down, just like the Armstrong planks, Amtico planks, Roppe planks, etc. This idea has been around for a long time, but Halstead has made a durable floor for most normal residentials floors that is guaranteed to not delaminate or wear through the top layer for 25 years. I think people misunderstand warranties on flooring a lot.