How To Change Headlight Bulb Chevy Lumina

You can have the fanciest wheels but it won't matter much if your headlights aren't working (and as we know from numerous movies and cop shows, a burned-out light will lead to an unwelcome stop by a highway patrol car). Fortunately, replacing a headlight bulb is a relatively painless process. Step 1: Locate the headlight holder You'll access your headlight bulb through your engine compartment, rather than from the front of the car. Open your hood and locate the headlight near the front of the vehicle. It will be in a bulb holder, with a power connector (usually three wires) leading to the bulb. Step 2: Remove the power wires The power wires are attached to a plug at the base of the headlight, and held by a plastic catch, a metal clip or a screw cap, depending on your vehicle. The plastic catch will have a small lever at the top -- push down on it while you pull the plug out. If you're dealing with a metal clip, pull it up and away, and be sure to hold onto it as you pull.

If you're dealing with a screw cap, you can unscrew it by turning it counter-clockwirse.
How To Remove Moen Spout Cap Step 3: Remove the old bulb.
Does Costco Tire Center Take Appointments Once the wires have been disconnected, you should be able to remove the back of the headlight holder and remove the old bulb by holding onto the base.
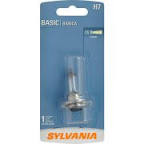
Discount Tires In Billings MtIn some cases, you may have to rotate the bulb a bit to get it free. Step 4: Clean and install the new bulb. Handle the new bulb with tissues or gloves -- you don't want oils from your skin getting on it. You should also give it a good cleaning with an alcohol wipe before you install it. Once the bulb is ready, stick it into the base of the plug.

If it's installed correctly, none of the bulb's rubber gasket will be showing. Once the bulb is in you can put the headlight holder back in place and plug the power wires back in. Make sure you test the bulb by turning on your headlights. Extra: Replacing Tail Light Bulbs The process for replacing rear tail lights (including your brake lights) is slightly different from working with your headlights. On some models the housing that includes the bulb is unscrewed from the outside, and on others you must unscrew it from inside the trunk. Once you've unscrewed the housing you may have to deal with tabs, screws or small knobs to open the tail light cover and access the bulb (make sure not to lose the screws if you need to remove them). You won't need to remove the electrical wiring, but make sure you don't pull out the housing too far, so you don't rip the wires. To unscrew the bulb, you should be able to pull it out directly (most modern vehicles are like this) or push it in and unscrew at the same time.

Once the new bulb is in, replace the housing and reattach it (screws, tabs, knobs, etc.). Again, make sure you test the bulb by putting the key in the ignition and trying the brakes.Home » Categories » Cars & Other Vehicles » Cars » Car Maintenance and Repair » Car Lighting » Headlights Edit ArticleHow to Fix Auto Headlights on a 2003 Impala Replacing headlight bulbs on a 2003 Chevy Impala can be done by removing full headlight and screwing in new light bulbs. This project does not require professional auto mechanic expertise or pricing. All you need to do is purchase the appropriate bulb you are replacing and follow the subsequent instructions. Pop the hood of your Chevy Impala in order to access the headlight systems. Pull the black plastic slate covering the Impala headlights' wiring to the Impala's electrical system using a flathead screwdriver in a pulling motion. Lift the large black plastic plate to see a white plastic lip to the one of the headlight clips.

4Remove the second Impala headlight clip located at the edge of the hood area, directly behind the headlight. Pull the entire Impala headlight until it pulls away from the Chevy Impala's frame. Disconnect the single connector that holds all of the headlight's wires to the headlight itself. 7Remove the plastic dust covering for the specific bulb you need to change. 8Press and hold the thumb lock in as you twist the bulb to the left in order to remove the bulb from the headlight. 9Remove the headlight bulb. Screw in a replacement bulb and replace the plastic headlight bulb dust cover. Reconnect the headlight connector that connects all if the headlight's wires to the headlight itself. Replace the Impala headlight to its place in the Chevy Impala and push until it snaps into place. Replace the white plastic clips on both location of the edge of the car directly behind the headlight and the location more towards the middle of the car underneath the black plastic plate.
Press down along the large black plastic slate until it snaps to re-secure. Close the hood of your Chevy Impala. Thanks to all authors for creating a page that has been read 6,182 times.How do you Change, Replace, or Install Broken 2006-2013 Chevrolet Impala Headlight Replacement Fits years: 2006, 2007, 2008, 2009, 2010, 2011, 2012, 2013 All Chevrolet Impala Headlights for sale Trim Panel Popper Tool (or flathead screwdriver) Step 2: Pry and remove the plastic retaining pins (4) that line the TOP edge of the radiator grille. To disengage these clips, pry the center, and THEN remove the clip from its position. Step 3: Loosen and remove the 7mm bolt (1) located at the UPPER/OUTER corner of the headlight assembly. Step 4: Lift and remove the plastic retaining tab near the INNER edge of the headlight assembly. Step 5: Pull the headlight from the vehicle. Step 6: Disconnect the wiring harness (1). NOTE: If you ordered your replacement headlight from Go-Parts, it likely includes new sockets/bulbs, as most of our models do.