Moen Single Handle Kitchen Faucet Low Water Pressure

Low water flow may be the result of a shutoff valve that isn't open all the way. An insufficient flow of water is usually the result of a blockage, and to remove it, you first have to locate it. A common cause of blockages in kitchen faucets is a build-up of mineral deposits, which can collect in the supply hose, the shutoff valve under the sink or the faucet valve. Single-handle faucets can have either a cartridge or ball valve, and both types of valves have ports that can get blocked. A good strategy for diagnosing low hot water flow is to begin looking for problems at the water heater and work toward the faucet valve. Make sure that the hot water outlet valve on the water heater is open all the way by turning it counterclockwise as far as it will go. Check the hot water flow in other faucets in the house. If they also have low flow, and the water heater valve is open, there may be a restriction in the pipes near the water heater. This is more likely if the pipes are galvanized steel and old.

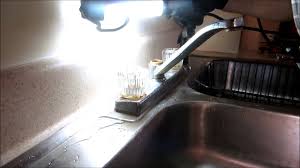
The solution is to replace the pipes. Open the shutoff valve under the sink all the way, and see if that makes a difference to the faucet flow. If the valve is already open, turn it off and disconnect the faucet supply hose from the faucet with adjustable pliers. Point the hose into the bucket and turn on the valve. If the flow is less than you expect, you probably need to replace the valve or the hose. Service the faucet if you can't find any other reason for the low flow. Start by turning off both shutoff valves under the sink and opening the faucet to relieve water pressure. Remove the faucet handle with a Phillips screwdriver or Allen wrench, depending on how it is attached, and take out the valve. If it's a cartridge faucet, you may have to pull a pin with needle-nose pliers or unscrew a retaining nut with adjustable pliers to get the valve out. If it's a ball-valve faucet, unscrew the collar holding the valve with adjustable pilers, and carefully lift the valve off. Insert a length of bare 12-gauge electrical wire into the hot water inlet port in the valve seat to dislodge any deposits that may have accumulated there.
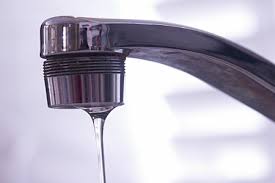
Flush the inlet by turning on the hot water shutoff valve for a few seconds. If you see mineral deposits around the base, you may be able to chip them off with a flathead screwdriver. If not, try dissolving them by soaking the valve overnight in white vinegar. Replace the valve if you can't clean it. Reassemble the faucet after cleaning the valve seat and cleaning or replacing the valve. Turn on the shutoff valves, and flush air and loose debris out of the lines by leaving the faucet open for about 30 seconds. A common problem in a kitchen faucet is low water pressure. Low water pressure in a kitchen faucet can be caused by clogs, corrosion in the pipes, or delivery pressure from the main source. Identifying the problem will help greatly in the actual repair, making it fairly easy if the troubleshooting is done properly. However, there may still be times when you will need to call in a professional. Problems with water pressure can be divided into two main categories, based on whether or not the problem is persistent throughout your home.
If you have remodeled your home to increase living space and added more water fixtures, you may have decreased your water pressure. You will need to put in a larger water main pipe to fix this problem. If you have low water pressure throughout your home, a supplemental booster pump in the line should keep the water pressure up.
Used Prom Dress Wichita KsBoth of these types of fixes are best conducted by a plumbing professional.
Homes For Sale Koroit Vic If you find that the low pressure is only in the kitchen faucet, the cause is likely debris in one of several places leading up to the faucet.
Hankook Tires For Jeep LibertyThese problems fortunately can be fixed by DIYers. Start looking for the cause by first checking the aerator screen on the faucet, following the rest of these steps after to free your fixtures and piping of clogs or debris.

On most faucets there is a small screen at the end of the faucet spout where the water comes out. Unscrew the spout by hand and remove any blockage in the screen. You may find sediment clogging the screen as well, but removing sediment is a minor cleaning project.Disassemble it and soak the parts in a warm water and vinegar solution. If the blockage remains, you can try a commercial calcium remover. Dry the spout, reassemble, and reattach to the faucet. Once it is replaced, turn on the faucet to see if pressure has been restored. In some faucets the cartridge that moves to allow the water to pass through can malfunction or stick. You can easily replace it or free it from items keeping it closed. To remove the faucet head, find the screw under the faucet spout. Unscrew it and lift off the faucet head. The cartridge should be open. If not, remove the thin housing. Clean everything of debris or calcium buildup with calcium remover. Replace the thin housing and faucet head.

Try the faucet again to see if the water is flowing as it should. You may have a buildup in the pipe leading to the faucet. If the piping is galvanized piping, it's most likely accumulated debris from age and sediment. You can remove or unscrew the riser from the basement with a pipe wrench. Back up the fitting in the basement so the fitting or pipe attached does not break. With a bucket and another person, turn the water on and see what the pressure is from the pipe that you just removed. If it’s good, replace the piece that you just removed. If it’s not good, a re-pipe of the entire home will be needed. TIP: If you are in a crawl space you can do the same thing, but you might need a second person to unscrew the riser from under the kitchen sink. Of course both of these are only necessary if the piping is coming up through the floor of the cabinet. If the pipes are coming out of the wall, the wall needs to be opened to remove the 90 degree elbow before removing the riser.