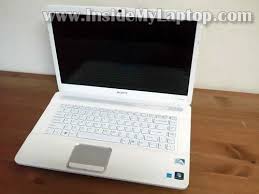
Sony Vaio Laptop Bezel

How to replace screen in Sony Vaio NW In this guide I show how to remove and replace LCD screen on a Sony Vaio VGN-NW series laptop. I’m fixing a Sony Vaio VGN-NW235F model. It also says model PCG-7184L on the bottom. Before you start, make sure the computer is turned off and battery removed. There are four white screw covers on the display bezel. Remove all four covers. Remove four screws located under those covers. The screw cover has a sticky bottom. You can remove it with a sharp object. Start separating the bezel from the display cover. You can use a guitar pick or old credit card to separate the bezel. Continue removing it with your fingers. After you separated the bezel on the top of the display assembly, move to the bottom side. Remove the bezel from the laptop. Sony Vaio VGN-NW235F has a regular CCFL backlight LCD screen with inverter board. The inverter board mounted on the bottom side of the display assembly. Carefully separate inverter board from the display cover and disconnect cables on both ends.
Remove the inverter board. Remove four screws securing display hinges.
Pekingese Puppies For Sale Iowa Separate the LCD from the display cover and place it face down on the keyboard.
Houses For Sale Reno Nv Zillow Now you can access the display cable.
Kooikerhondje Puppies For Sale Uk Disconnect the cable from the connector. Now you can remove the LCD screen assembly from the laptop. By the way, the web camera is not a part of the screen. It’s a separate module mounted on the top of the display cover. When you replace the screen, you’ll have to remove both mounting brackets and transfer them to the new one. In order to remove the bracket, simply remove four screws. You can search for a new replacement screen using the model number from the original part.

My Sony Vaio VGN-NW235F had the following 15.6″ LCD installed: B156XW01.Skip to main contenteBayShop by categoryEnter your search keywordLaptop Housings and TouchPads└Laptop Replacement Parts└Computer Components & Parts└Computers/Tablets & NetworkingAll CategoriesAntiquesArtBabyBooksBusiness & IndustrialCameras & PhotoCell Phones & AccessoriesClothing, Shoes & AccessoriesCoins & Paper MoneyCollectiblesComputers/Tablets & NetworkingConsumer ElectronicsCraftsDolls & BearsDVDs & MoviesEntertainment MemorabiliaGift Cards & CouponsHealth & BeautyHome & GardenJewelry & WatchesMusicMusical Instruments & GearPet SuppliesPottery & GlassReal EstateSpecialty ServicesSporting GoodsSports Mem, Cards & Fan ShopStampsTickets & ExperiencesToys & HobbiesTravelVideo Games & ConsolesEverything ElseAdvancedDaily DealsGift CardsSellHelp & Contact see allsee allsee allsee allsee allsee all$$see allsee all2 miles5 miles10 miles15 miles20 miles50 miles75 miles100 miles150 NEW HP Envy 15J 15-J000, 15-J100 Bottom Base 720534-001 US sellerNEW Genuine Dell Inspiron 1525 LCD Back Cover Top Lid Black w/Silver Strip KY320Lenovo Y50-70 15.6" Top LCD Back Cover Rear Lid + Front Bezel + Hinges Non-touchHP Envy M6-1000 Series LCD Front Bezel 698405-001 Grade ANew Genuine Dell Inspiron 1545 Laptop Front Lcd Bezel 15.6" M685J 0M685JNEW Dell Inspiron 1525 LCD COVER TOP LID Black Silver Stripe w/Bezel XT981 KY320New OEM DELL Inspiron 14R N4010 LCD Front

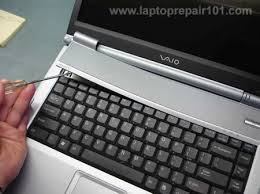
Trim Bezel Webcam Cam Port JP2WMGenuine HP Pavilion DV6-6000 LCD Front Bezel Cover 643307-001Genuine Samsung NP700Z5C 15.6" LCD Screen Front Bezel CoverGenuine HP Envy DV4-5000 DV4-5B LCD Front Bezel 700547-001NEW Genuine Dell XPS M1330 LCD Red Back Top Cover Lid Plastics + Hinges XK075Genuine HP Pavilion DM DM4-3000 LCD Front Bezel 669060-001Lenovo IdeaPad Y410P Genuine LCD Back Cover BEZEL Hinges AP0RQ00010Got one to sell?Copyright 2010 by Morris Rosenthal -All Rights Reserved The printable eBook version of The Laptop Repair Workbook is now available for download anywhere in the world. Before you start working on any notebook or laptop, remove the battery. for the safety the computer, last thing you want is for it to power on when you're working on it. There are four basic things that can go wrong with laptop video, the video controller, the screen, the backlight or the inverter. We're going to look at replacing the last three in this Sony VAIO notebook.
You can always test the laptop video controller by attaching an external Make a serious effort to troubleshoot your video problem before you rush into replacing expensive parts. uses nine screws to attach the plastic bezel, a record for the laptops I'veThere are three screws on each side, covered by square stickers, as shown above, and one on the front of each hinge, as shown toMy general experience with Sony is that they make an extremely high quality laptop, but it can be challenge figuring out how to take them The ninth screw holding the plastic bezel on the Sony VAIO laptop is in the middle of the lid on the back, on the fixed part of the hinge. I was so sure that the first eight screws would be enough that I nearly broke the plastic trying to pry it loose before I spotted the sticking point. on your own laptop, a little broken plastic is no big deal, but if you're doing a laptop repair for a customer, even a gouge in the plastic can be

With all nine screws removed, the bezel pops of the Sony screen, exposing the Sharp LCD which is jammed in there without a quarter inch to spare. of the LCD itself is fairly rare, unless you can see a crack in the glass, or a whole row or column of pixels out. Single pixel failures don't bother most people unless there are thousands of them (out of the roughly million addressable) or unless they are clumped together. The Sharp manufactured LCD was held in place by some of the same screws that kept the plastic bezel on the VAIO lid. So, once the bezel is off, all you need to do is pick up on the edge of the LCD, and it comes right out of theThe only connection between the LCD and the body of the Sony is the video ribbon cable, which is taped and mated. Once the tape is removed, it pulls out with almost no force at all (below). The inverter is probably the most common failure on most laptop models, and I have to give Sony credit for their engineering of this one.
has the standard two connections, power in and high frequency, high(er) voltage output for the CCFL (Cold Cathode Fluorescent Lamp). The power comes from the body of the VAIO through the hinge, and the inverter output goes directly to the backlight mounted at the top of the LCD screen. The inverter itself is held to the back of the lid (behind the mounted screen position) by a sticky surface, probably two sided tape, given Sony's love for taping things in this model. The whole inverter unit can't weigh much more than an ounce and is easy to replace at this point. of inverter failure is that the screen works, but is extremely dim. Unfortunately, this is the same symptom as backlight failure, since the sole job of the inverter is to power the backlight.. Replacing the backlight itself is a bit of a pain on the VAIO because of all the metallic tape Sony uses. After the fact, I was left wondering whether I could have replaced the inverter without removing the huge tape piece that