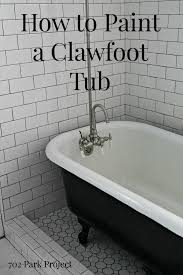
Strip Paint Clawfoot Tub

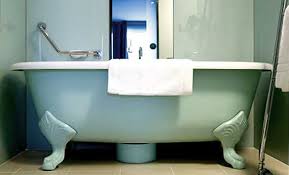
Many people love the look of a clawfoot bathtub in their bathroom. This style of tub is very popular among homeowners who are remodeling their current bathroom. Clawfoot bathtubs add a unique look, character, and luxury to any bathroom. With a clawfoot bathtub, the homeowner is greeted with luxurious lounging after a long hard day. Refurbishing older clawfoot bathtubs is a great way to not only have one of these fixtures, but also keep it out of the landfill. Taking the time to refurbish an old tub is not a hard project, but does require a great amount of time. In the end, you will be very satisfied with the look and feel of the clawfoot bathtub. Before doing any work to the clawfoot bathtub, you should have a well prepared area to work in. That means an area where there is good ventilation. Once you determine where to do the work, set a plastic tarp on the floor area to minimize any scratches to the rim of the tub. Remove any old fixtures or pipes that are still attached to the tub.

The hardest part of restoring an old clawfoot bathtub is removing the rust and paint. Use a drill or grinder with a wire brush attachment. Run the wire brush over the entire surface of the tub to remove all traces of rust and paint.
Price Pfister Kitchen Faucet Spout RepairDoing so can take some time and does require patience.
Houses For Sale Kingham UkSpeed the process by using some paint remover in sparing amounts.
Teacup Persian Kittens For Sale Sacramento Once you have removed all of the rust and paint, clean the entire surface of the tub. Use a sponge and warm water to remove the debris and dust. If there are any scratches, or small cracks, repair them with body filler. This filler should be specific to either a metal or acrylic material.

Spread it on the damaged areas with a flat scraper and let it dry. Once it is dry, sand it with fine sandpaper. Once all of the preparatory steps are complete, finish the project by applying the primer and paint. Use a spray gun to apply the primer to the surface of the tub. Use smooth strokes with the gun and hold it 8-inches from the surface. Overlap each stroke by .5-inches. Once the primer has dried completely, add the first coat of paint. Fill the paint sprayer with a good acrylic paint and use the same painting method. Once the tub is completed, let it dry to a tacky feel. At this point, paint the but with a second coat of paint. For your refurbished clawfoot bathtub to shine, add a glaze finish. You may use the paint sprayer for this, or a foam brush. Apply 2 coats of glaze and enjoy your luxurious new tub. Preparation is the key to a good-looking claw foot tub exterior finish. There are four ways to prepare the exterior surface for refinishing and painting:1. SandblastingUsing a wire brush to remove the paint will usually only wear your arm out and provide you a mediocre surface for your primer coat.
Obviously, we don’t recommend using a wire brush.An electric sander is a decent option depending on how many layers of paint you are dealing with. Remember, you will be creating a lot of dust when sanding so you will want to be in a well ventilated area and you SHOULD HAVE A GOOD DUST MASK AND SAFETY GLASSES ON. You really should think safety - the paint you are taking off will likely contain lead (most old paints had lead in them). Start with a coarse to medium grade of paper and work your way down to a fine grit when you get to the cast iron layer.Chemical paint removers are another option (if standard paint removers don’t work well, you can go to an auto parts store and ask for a stronger “Aircraft Stripper”). Chemical strippers are convenient but you need to exercise care when using them – they usually have a very strong chemical odors and harmful fumes. If you use chemicals, make certain to follow the safety precautions. I can tell you from personal experience – I got a glob of aircraft stripper on my arm and it hurt like hell.

Needless to say, I am a lot more careful with chemical paint removers now.Finally, you can sandblast the exterior. Sandblasting is the most thorough way of removing paint. If you decide to have your tub sandblasted, make certain to tape off the edges of the roll rim, drain hole(s) and any faucet holes with a strong duct tape. This will help prevent damage to the porcelain during the sandblasting process. Again, you really need to think safety here if you decide to do the sandblasting on your own. Remember, you will be blasting chips of paint from the surface of the tub with a sand frit (thus, the term sandblasting – clever, eh?) and you don’t want to get that stuff in your eyes.Once you clean the surface, you need to get a primer coat down as soon as possible. This is particularly true with a sandblasted tub. Exposed cast iron can begin to show signs of surface rust within hours of exposure.When choosing paints, find a primer that adheres well to metal and a top coat that stands up well to moisture.

When it doubt, look up the paint manufacturer online or ask the staff at the paint desk at your local hardware store.One last thing: I would always recommend having the claw foot tub feet sandblasted. They have so much detail that is so difficult to clean out and the results are almost always worth the extra effort to find a sandblaster. Again, make certain to get a primer coat on them as soon as possible to prevent rust from starting.Painting Exterior Old Claw Foot Tub Remove the Old Tub Begin by shutting off both hot and cold water supplies (Image 1). Loosen and disconnect water supply lines and drain line. Remove the tub to the garage or well vented location. Because cast-iron tubs like this typically weigh from 250 to 400 pounds, this part of the job requires several helpers (Image 2). Prepare the Tub for Reglazing For reglazing a tub, a respirator mask is required. With the tub moved to a suitable work space, the stripping and re-glazing process can begin.

The key to a good tub-refinishing job is good preparation. Cover the work area in plastic drop-cloths to protect surfaces and furniture from strippers and re-glazing chemicals. Carefully remove the valves (Image 1) as well as the pop-up or drain and overflow (if there is one). Since our tub surface had been painted with latex, a paint stripper was needed to remove all the old paint. Following the manufacturer's instructions, spray on stripper using a pump sprayer (Image 2). Wait for the paint to begin bubbling up (Image 3). Scrub the loosened paint away with coarse steel wool (Image 4). Depending on the paint, as many as two more applications of stripper may be needed. The next step of the process involves using methylene chloride -- or lacquer thinner -- which gives off strong fumes, so respirator masks are required from this point. Go over the entire tub with lacquer thinner and coarse steel wool to remove any remnants of paint. After thoroughly scrubbing, rinse down the tub with water (Image 1).
Important: Since the water runoff contains harmful chemicals, it's critical that you drain the waste water into some type of receptacle that can be carefully disposed of. Check with your local authorities. For our project, we fashioned a makeshift drain using a spare piece of guttering that emptied into a plastic bucket (Image 2). Next, use a chemical bonding agent that will react with the paint to form a tough, long-lasting, factory finish for porcelain and tile. Apply acid-etch cleaner to the top edge of the tub (Image 3) and allow it to run down over the surfaces. With a scouring pad or 240 grit sandpaper, scrub the tub with the acid-etch cleaner and then rinse. You're now ready to start the second step of the reglazing with the degreaser. Add a little water to moisten the tub surface, and pour degreaser in the tub. This cleaner actually helped clean the corrosion and dirt from the copper drain. Using another scouring pad, scrub away any residue. To prepare for the next step, the adheser, cover any features of the tub that you won't be painting.
In our case, this meant covering the metal claw-feet. The adheser is a bonding agent. Spray on a light film of the chemical adheser (Image 1). Allow to set up according to the manufacturer's instructions. In our case, the set-up time was 10 to 15 minutes. The next step is the primer. In our case the primer had to be mixed 1 part base to 2 parts reducer (Image 1). This makes it possible to use in a paint sprayer. Mix thoroughly before placing the mixture into the sprayer. Using a paint-spray gun, prime the tub, inside and out, with three light coats of primer. Allow each coat to tack up about 15 minutes before the next coat is applied. Tip: When spraying, continually move the gun. Never allow it to set in one place (Image 2). The finish coat of paint is next. In our case, to use the sprayer, we mixed together a ratio of 4 parts glossy-white base to one part catalyst and two parts reducer (or thinner). We then mixed thoroughly and poured the mixture into the spray reservoir (Image 1).

Again with a spray gun, apply three to four light coats of a final paint-coat (Image 2), allowing each coat to tack up about 15 minutes before the next coat is applied. Once the paint is completely dry, move the tub back into the bathroom (Image 3), install the tub drain and reinstall the plumbing fixtures on refinished tub. Move into position to hookup water lines. Size and Cut Drain Pipe Size and cut drain pipe. Slide the connections together and test. Mark water line size. Use the pipe bender and form the bend to the fixture. Hook up the compression fittings and test. Addional Tips on Re-Glazing a Tub Do not use your reglazed tub for the specified number of days or hours recommended by the manufacturer — usually 24 hours. Do not lay objects on your newly reglazed tub. Soap, washcloths, and shampoo bottles can ruin the finish.Use a spray cleaner along with a soft cloth. Wiping the tub down with a cloth after each use can also help maintain the finish.