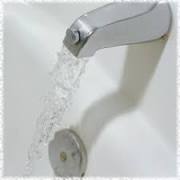
Tub Spout Leaking At Base

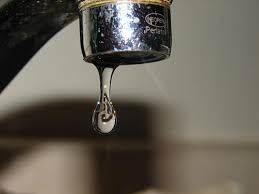
Doing your own faucet repair may seem daunting, but once you learn the basics, modern faucets are pretty easy to fix. In fact, the hardest step is usually finding the right replacement parts. In this article, we’ll tell you how to find replacement parts and show you how to stop spout drips on the three main types of single-lever faucets: rotary ball, cartridge and ceramic disc. We’re showing kitchen faucets, but you can fix most single-lever bath faucets using the same procedures. We'll also show you how to stop leaks around the base of the spout. The tools you'll need vary a little depending on the faucet you’re repairing. You’ll probably need an Allen wrench to remove the handle. Buy a set of small Allen wrenches, and you’ll be prepared for any faucet. Most repairs also require screwdrivers and a large slip-joint pliers. Follow These Basics For All Faucet Repairs Before you start, examine the faucet closely to determine where the water is coming from. Leaks around the base of the spout require a different repair than a drip from the end of the spout.

Then turn off the water supply to the faucet. You'll probably find shutoff valves under the sink. If those valves don’t work or if you don’t have any, you'll have to close the main water valve to your entire home. After you turn off the water, open the faucet in the center position to relieve water pressure and make sure the water is shut off. Finally, cover the sink drain holes with strainer baskets or rags to avoid losing small parts down the drain. Pay close attention to the order and orientation of parts as you remove them. A digital camera or video camera is handy for recording each step in case you forget. For easier reassembly, set the parts aside in the order they were removed. When all the parts are out, inspect the interior of the valve for bits of deteriorated gaskets or mineral deposits. Use a cloth or fine nylon abrasive pad to clean the surface. Loosen mineral deposits by soaking them in vinegar. Slow water flow can be caused by plugged holes in the faucet body.

Use a small screwdriver or penknife to clean them out. Before you replace worn parts and reassemble the faucet, hold a rag over the faucet and open the water shutoff valve slightly to flush out debris that may have been loosened during the cleaning and inspection. After the faucet is reassembled, open the faucet to the middle position and gradually open the shutoff valves to turn on the water. Leave the faucet open until water flows freely and all the air is out of the pipes.
Airpark Home For Sale TexasIf the water flow through the faucet is slow, the aerator (Figure A) may be plugged.
Tires For Sale P215/55r17Unscrew the aerator and clean it out.
Akc Lab Puppies For Sale In Phoenix Take the Old Parts to the Store to Find Replacements
You'll often find the brand name stamped on the faucet. And this information will help when it comes time to find repair parts. But in most cases, the safest bet is to take the worn parts to the store with you. If you have a Delta or other rotary ball faucet (Figure A), you’re in luck because you’ll find repair kits in most hardware stores and home centers. Cartridges and repair kits for Moen “cartridge type” (Figure B) faucets are also readily available. But if you have another brand or a disc-type faucet, you may have to order parts, since there are too many variations for most stores to keep in stock. It helps to know the faucet's model name or number when searching for a replacement cartridge. Otherwise, take the cartridge with you to the store so you can match it to a photo in the parts catalog. Plumbing supply specialists are also a good source of repair parts. If you’re having trouble finding parts, call the manufacturer of your faucet for help. How To: Replace a Crusty Old Tub Spout

Replacing a tub spout is a straightforward project whose necessity arrives sooner or later in the life of most bathrooms. A tub spout does two things: It provides a decorative cover for the pipe stub delivering water to the bathtub, and it directs the water away from the wall where it could cause damage. Our spout was more or less failing at both functions. It was severely pitted and judging from the amount of caulk around its base, the spout had a long history of leaking. Related: Soak Up the Luxury with a Free-Standing Tub For ease of installation and a gap-free fit at the wall, we chose a slip-connection replacement spout. Several types and styles of spouts are available; be sure to select one that complements the design of your shower system. For example, if you control the shower with a diverter knob, buy a spout with a diverter. If, on the other hand, the diverter is not part of your shower control, buy a spout without a diverter. Bear in mind that if your replacement spout is one that threads into place, picking up some plumber’s tape is a good idea, since wrapping the old threads will ensure a watertight joint.
- Large screwdriver or wood hammer - Razor scraper with new blade - Mini tubing cutter - Slip-connection tub spout (with or without diverter) 1. Scrape off old caulk. If there was a gap between the old spout and the wall, the new spout will eliminate it. 2. Insert a large screwdriver or the handle of a wood hammer into spout, using the tool as a lever to rotate the spout in a counterclockwise direction. Unthread and remove the spout. 3. Use a tubing cutter to cut the pipe stub to a three- or four-inch length. 4. Clean the stub with steel wool until it’s bright and smooth. Make sure no burrs or sharp edges remain. 5. Apply a dab of silicone grease. 6. Slide the new spout onto the stub. 7. Lock the spout in place by tightening the set screw with the supplied Allen wrench. Universal Tub Spout with Diverter Diverter Spout in Chrome Universal Diverter Tub Spout in Chrome Adjustable Tub Spout with Front Diverter in Chrome Finish