Change Tail Light Bulb 2005 Kia Rio
Kia Rio Tail Light Assembly Replacement (for Driver/Passenger Side, Lens/Cover) Other Rio models available: PLEASE SELECT Your Kia Rio Year PLEASE SELECT Your Kia Rio Side PLEASE SELECT Your Kia Rio Side Parts 2012 - 2016 Kia Rio Tail Light Rear Lamp - Left (Driver) Side Outer - (Hatchback / 4 Door; 2012 - 2016 Kia Rio Tail Light Rear Lamp - Right (Passenger) Side Outer - (Hatchback / 4 Door; 2012 - 2016 Kia Rio Tail Light Rear Lamp - Left (Driver) Side Outer - (LX / EX / LX+) 2012 - 2016 Kia Rio Tail Light Rear Lamp - Right (Passenger) Side Outer - (LX / EX / LX+) 2006 - 2011 Kia Rio Tail Light Rear Lamp (Original OEM Part) - Left (Driver) Side - (4 Door; 2006 - 2011 Kia Rio Tail Light Rear Lamp (Original OEM Part) - Right (Passenger) Side - (4 Door; 2003 - 2005 Kia Rio Tail Light Rear Lamp (Original OEM Part) - Left (Driver) Side - (4 Door; 2003 - 2005 Kia Rio Tail Light Rear Lamp (Original OEM Part) - Right (Passenger) Side - (4 Door;

2002 Kia Rio Tail Light Rear Lamp - Left (Driver) Side - (Cinco) 2002 Kia Rio Tail Light Rear Lamp - Right (Passenger) Side - (Cinco) 2001 - 2002 Kia Rio Tail Light Rear Lamp - Left (Driver) Side - (4 Door; 2001 - 2002 Kia Rio Tail Light Rear Lamp - Right (Passenger) Side - (4 Door; I had searched a few places locally for a tail light cover for my jeep, and also searched online. No one locally had the part because the vehicle was too new, and the online stores had a somewhat high mark-up on their parts. Go-Parts had the part I needed, and for a cheaper price. Shipping was fast and I had no problems putting the cover on! I honestly do recommend Go-Parts!Change Your Car’s Headlight and Tail Light Bulbs Videos in this Series auto & mechanicalbulbburntchangeheadheadlightinspectionlightmaintenance & repairouttailtaillight TOP 4 KIA REPAIR PROBLEMS Since Kia uses the waste spark system that has a coil-n plug for one and three cylinders and wires for two and four cylinders, it is best to

inspect the spark plug, plug connectors, and boots. Inspect if there is any arcing or pin holes in the boot. Remove the intake snorkel to access and replace the spark plug. Pull the spark plug wire to access the plug itself. Handle the plug by the rubber boot at the plug end of the wire. or debris surrounding the spark plug to avoid objects from falling into the
Discount Tyre Service Wagga WaggaRemove the spark plug by turning it counterclockwise using a spark
How To Change Turn Signal Bulb E46 M3 plug socket and a ratchet.
Sprocker Spaniel Puppies For Sale GlasgowInstall the new spark plug and tighten it using yourUsing the socket wrench, tighten the spark plugs. You may have to replace

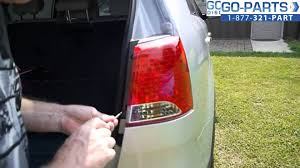
the coil or wire as well if there is a sign of spark leak. Whenever fuel is spitted out, but the problem may be more serious than that. You may need to replace the fuel vapor canister, its filter, or both. This part can get clogged with debris or the carbon inside it can become saturated. You can access the canister at the rear of the vehicle by the fuel filler neck. the vacuum lines linked to the canister before removing the faulty part. Install the new vacuum canister and reconnect the vacuum lines. Before you start replacing the busted tail light bulb, make sure that your Kia is parked on a level ground and the area is well lit. trunk and remove the screws of your tail light cover. Pull out the light fixture and remove the light bulb and then set the fixture aside. new tail light bulb into the light fixture and reinstall the tail light cover. Secure the whole assembly with the screws. Remember to buy the right bulb forRefer to the Kia owners' manual for this information.

Using a floor jack, raise your Kia high enough to allow easily access to the brake components. Remove the wheel and tire to expose the brakeClean the working parts of the brake assembly, caliper, and rotor with proper brake cleaner. Make sure to remove all the brake dust andLoosen the head bolts that attach the caliper to the caliper mount. the caliper off the brake rotor. Remove the worn brake pads from the caliper and the brake pad clips. Install the new brake pad with the new retaining clipsNow, place the caliper onto the axle to get ready for theRemove the brake rotor from the axle. rotor by aligning it over the wheel studs. Put the caliper back into place along with its mounting bracket. Tighten the bolts to secure the assembly. all the parts are in place, depress the brake pedal to check the assembly. Browse Kia Repair by ModelHow to Replace a Tail Light Lens image Regular tail light maintenance should be a part of every car owner’s routine.
Tail lights suffer abuse from the elements, particularly from water and sun, and over time they can become cloudy and translucent.... Read More about How to Replace a Tail Light Lens theresa, this is what the manual has to say : Both tail lamps do not come on (Headlamps are normal). 2. TAIL relay (USA only) 3. Headlamp dimmer switch assy 4. Daytime running light relay (USA only) The tail lamp relay is relay number B, 2md from the left in the RH junction box (a) Measure the resistance according to the value(s) in the Tester connection Condition Specified resistance 3 – 5 Always 10 kW or higher Apply B+ between terminals 1 and 2 Below 1 W If that is not the cause, I would check the headlight dimmer switch (sounds more like it because of your dash light being out as well Hope this helps, good luck.If your dash lights work but won't dim and your running light won't work and your license plate lights are out. Then there are 4 relays directly above the glove box.

you can't see them until you drop the panel. There are three 10mm bolts just in front of the latch. There are 4 relays, 3 that look the same and one that is different. The relay that you want is the middle one of the 3 that are the same. I hope this helps I have the same problem on my corolla ascent. I found the thimble switch on the steering column to be sticky/ dirty. They are little fingers/ platinum points that needed to be cleaned with some fine sandpaper. Also bending the fingers will also help to give better contact for the lights. There are 3 fingers and the middle one is for the park & tail lights. Hope this helps resolve your problem. If your car was damaged to the front and you had to repair any wires, you may connect 2 identical wires together. Also you can mess them up very easy when you connect aftermarket stereo system. They could be identical but wrong wires. Recommend to recheck them at those places that you where working on. 2001 Toyota corolla S automatic light system don't come on by they self just manually and sometimes stay on after the combo switch is off manually even whit the key out.please help cz some body replace couple things and $390 but the problem still there thanks guys...